The Weekend Tincture Method
An Herbalist's Guide to Percolation Extraction
A Note Before We Begin:
Percolation is generally considered an advanced medicine-making technique. This article assumes a basic familiarity with tincture making, extraction ratios, and herbal preparation methods.
If you are new to herbal medicine making, don't let that discourage you. Read through the process, take notes, and come back to it after you've made a few traditional maceration tinctures. The plants will still be here when you're ready.
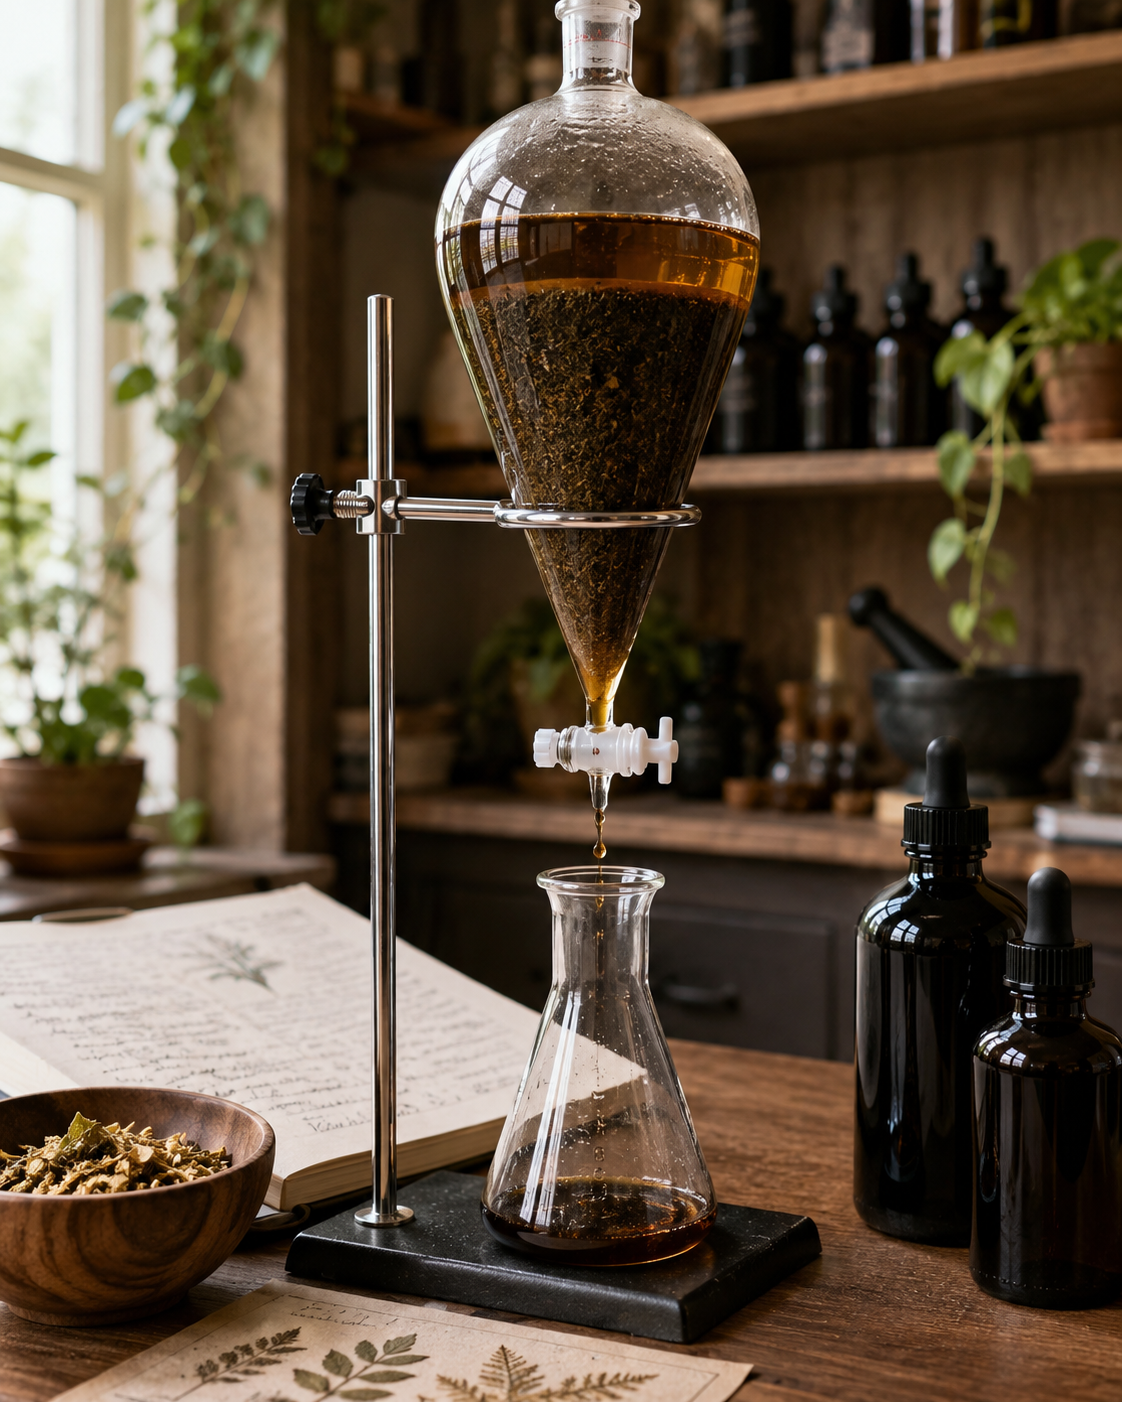
I am currently using a separatory funnel rather than a more traditional dropping funnel for a series of experiments. The image here reflects the separatory funnel that is currently in use in my apothecary.
Most herbal tinctures are prepared through maceration, a process in which herbs are soaked in menstruum for several weeks before being pressed and filtered.
This works beautifully, assuming you planned ahead.
I, however, am an herbalist.
That means I frequently find myself digging through 47 jars of macerating herbs only to find that the medicine I need is the one thing I forgot to start six weeks ago.
How Percolation Saved My Seeker Launch
Percolation is one solution to this entirely self-inflicted problem.
When performed correctly, percolation can produce a finished tincture in about 48 hours rather than three to four weeks. Instead of waiting for the herb and menstruum to slowly exchange constituents over time, the solvent continuously moves through a carefully prepared column of herb, extracting as it travels.
Some herbalists argue that percolation produces a stronger extraction. Whether or not that is universally true is a debate for another day. What I can say is that percolation gives the herbalist tremendous control over the finished medicine and makes it possible to create a high-quality tincture in a fraction of the time required for traditional maceration.
I recently found myself reaching for this method while preparing Lavender tincture for another batch of Seeker. Lavender has been getting a standing ovation in the apothecary lately, appearing in headache formulas, muscle rubs, Nervine No. 9, and now our new Meditation Ally, Seeker. The demand was high, my tincture inventory was low, and percolation came to the rescue.
What Is Percolation?
Percolation is a method of extraction in which menstruum is allowed to slowly pass through a column of moistened herb.
Rather than immersing the plant material in alcohol and waiting for diffusion to occur over time, percolation relies on gravity to move the menstruum through the herb bed.
As the solvent travels through the plant material, it dissolves and carries away extractable constituents. The resulting tincture is collected from the bottom of the percolator.
When done correctly, the finished medicine can closely resemble a traditionally macerated tincture while requiring only a fraction of the time.
Herbs That Work Well for Percolation
Many dried herbs respond beautifully to percolation, including:
Lemon Balm
Calendula
Percolation tends to work best with herbs that remain relatively porous after moistening.
Herbs That Can Be Challenging
Some plants are not as well-suited to this method, because they are tough or dense, have a tendency to swell, become mucilaginous, or compact tightly.
Examples include:
Marshmallow Root
Slippery Elm
Chia Seed
Psyllium
Fresh plant material
Highly resinous herbs
Lavender deserves special mention.
While Lavender can be successfully percolated, its high concentration of volatile oils may slow flow rates or create areas of compaction if the herb is ground too finely. A slightly coarser grind often produces better results.
Like all plants, Lavender has her own preferences. Part of becoming a well-behaved herbalist is learning to listen to our plant teachers.
Equipment
Percolation cone, funnel, or percolator
Filter paper, cotton round, or coffee filter
Collection vessel
Gram scale
Graduated cylinder or measuring vessel
Mortar and pestle or herb grinder
Dried plant material
Menstruum
Most herbalists I have known use some variation of a homemade percolation setup consisting of a screw-top wine bottle with the bottom cut off by their glass-artist friend, mounted vertically in a wooden frame.
(Rule #17 of being an herbalist: there is always a glass artist friend. There is also always a woodworker friend.)
The screw cap becomes an effective flow-control mechanism. Tighten it to slow the drip. Loosen it to speed things up. Like an old-school dial-a-flow gravity drip, for all my nurse friends.
My own apothecary has always had strong Alchemist energy, so I typically use a dropping funnel or separating funnel mounted on a lab stand. It looks slightly more dramatic, which I suspect improves the extraction by at least 3%.
Either method works beautifully.
Step 1: Decide How Much Medicine You Want to Make
Before touching a grinder or measuring a drop of menstruum, decide how much finished tincture you want to produce.
This single decision determines everything that follows, including herb weight, menstruum volume, percolator size, and expected yield. No pressure.
For this batch of Lavender tincture, the answer was determined by a forthcoming batch of Seeker. Once I knew how much finished tincture I wanted, the rest of the calculations became straightforward.
Percolation rewards planning. The more accurately you determine your target volume at the beginning, the easier the entire process becomes.
Step 2: Calculate Herb Weight and Menstruum Volume
Once you know how much finished tincture you want to produce, you can work backward to determine the amount of herb and menstruum required.
For example, if I want 500 mL of a 1:5 tincture, I divide the desired finished volume by the tincture ratio:
500 mL ÷ 5 = 100 g herb
This tells me I will need approximately 100 grams of dried herb for the extraction.
Step 3: Grind the Herb
The herb should be ground to a coarse but relatively uniform consistency.
Too coarse and extraction efficiency decreases.
Too fine and the herb bed may compact, slowing or completely stopping flow.
Judging the necessary grind is a skill, (like any other), that improves with practice. I would say that, in my experience, many percolation problems begin with over-grinding.
Step 4: Prepare Your Menstruum
As with any tincture, begin by selecting the appropriate solvent strength.
Different plants extract best at different alcohol concentrations. The ideal menstruum depends upon the constituents you want to capture.
My favorite references for determining menstruum strength and extraction ratios are Making Plant Medicine by Richo Cech and The Modern Herbal Dispensatory by Thomas Easley and Steven Horne. Both remain within arm's reach of my apothecary bench at all times.
For Lavender, I chose to blend a fortified brandy at a strength designed to capture her aromatic oils while preserving her lovely character.
Step 5. Determine Your Target Ratio
Most percolation tinctures are prepared using the same ratios used in a standard maceration.
A tincture ratio describes the relationship between the weight of the herb and the volume of the menstruum. A 1:5 tincture means that for every 1 gram of dried herb, you will use 5 mL of menstruum.
Your menstruum volume is determined by the weight of your dry herb. (Or vice versa, but that's a discussion for another day. The point is, they are in relationship.)
Formula
Herb Weight (g) × Menstruum Factor = Base Menstruum Volume (mL)
Examples
For a 1:5 tincture:
100 g Lavender × 5 = 500 mL menstruum
For a 1:3 tincture:
100 g Lavender × 3 = 300 mL menstruum
For a 1:7 tincture:
100 g Lavender × 7 = 700 mL menstruum
This calculation gives you the base menstruum volume needed to achieve your desired tincture ratio before accounting for displacement volume.
Step 6: Measure Displacement Volume
Before moistening the herb, transfer the freshly ground plant material into a graduated cylinder or measuring vessel and note its dry displacement volume.
This measurement represents the amount of space the herb occupies and allows you to estimate how much menstruum will remain trapped within the herb bed.
By measuring displacement and adding that volume back into your menstruum calculations, you can come much closer to your intended finished tincture yield.
It takes only a few moments and saves a surprising amount of disappointment later.
Step 7: Moisten the Herb
This step is often called imbibition or pre-moistening.
Combine the dried herb with a portion of the menstruum and mix thoroughly until the material resembles damp soil.
Every particle should be evenly moistened.
This is where I am going to get controversial.
Most books recommend allowing the herb to rest for several hours or overnight before packing the percolator.
The master herbalist who taught me this method told me they rarely wait longer than thirty minutes unless, (and I quote), "I forget about it."
I usually split the difference and allow mine to rest for an hour or two.
If you, like me, happen to be both an herbalist and a mushroom cultivator, you'll recognize the ideal texture immediately when the herb has reached what mushroom growers call "field capacity".
When squeezed in the hand, it feels like damp sand.
This step allows the plant material to fully expand before entering the percolator, reducing the likelihood of channeling later.
Step 8: Pack the Percolator
Place filter paper, a cotton round, or your chosen filtering material into the bottom of the funnel or percolator.
If you use a pre-made coffee filter, avoid the cone-shaped versions that are glued at the seam. Otherwise you'll have glue in your finished tincture.
Transfer the moistened herb into the percolator in stages.
I was taught to add approximately one-third of the herb, tamp gently into an even layer, add another third, tamp again, then add the final portion.
The goal is an evenly, and gently, packed column.
Too loose and the menstruum will channel through the herb, creating an uneven extraction.
Too tight and the menstruum can't move freely through the herb bed and may stall entirely.
Step 9: Overnight Maceration
Add enough menstruum to cover the herb bed and allow the material to settle.
Once saturated, begin adding the remaining menstruum gradually.
I was taught that patience produces better medicine.
(Don't worry if you suffer from terminal impatience. I have been taught that patience is a virtue, but have often found that it isn't one of mine.)
Open the stopcock until the menstruum pulls all the way through and just begins to drip into your collecting vessel. Then close it up and allow it to macerate for 24 hours. This allows the menstruum to begin breaking down the cell walls and start the process of extraction. I like to think of it as like a first date. The herb and the menstruum have to loosen up and get to know each other a bit.
Step 10: Percolation
After 24 hours, open the stopcock enough to allow the menstruum to begin to drip into the collecting vessel.
Aim for a slow, steady drip.
The slower the flow, the more opportunity the menstruum has to interact with the plant material.
Continue the drip process until the full volume has been collected.
Step 11: Filtering & Bottling
Once percolation is complete, allow the tincture to settle before bottling.
This is another one of those places where patience improves the finished medicine.
Even a well-executed percolation often contains small particles that remain suspended in the liquid immediately after extraction. Given a bit of time, many of these particles will naturally settle to the bottom of the vessel.
Once the tincture has settled, carefully decant the clear portion away from any sediment.
At this point, you may choose to filter the tincture before bottling.
For many years, my preferred method has been a double layer of cheesecloth. This works beautifully for removing larger particles and is often perfectly adequate for personal use.
For tinctures intended for retail sale, gift-giving, or those moments when you want the finished medicine to look particularly polished, an additional filtration step can be worthwhile. Cotton rounds, coffee filters, and laboratory filter paper all work well for removing finer sediment and improving clarity.
There is no universally correct level of filtration.
Some herbalists prefer a brilliantly clear tincture. Others are perfectly happy with a small amount of sediment, viewing it as evidence of a minimally processed medicine.
My preference falls somewhere in the middle. I remove anything likely to continue settling in the bottle, but I try not to become so obsessed with clarity that I forget the point is making good medicine.
(Note: Many percolated tinctures benefit from resting for several days before evaluation, allowing flavors, aromas, and subtle characteristics to integrate.)
Once filtered, transfer the tincture into clean bottles, label everything immediately, and congratulate yourself on completing one of herbalism's more satisfying extraction techniques.
Because if there is one thing herbalists are known for, it is meticulous labeling. (Can you feel my eyes rolling?)
Troubleshooting
Channeling
Occurs when menstruum finds a path of least resistance and bypasses portions of the herb bed.
Usually caused by uneven packing.
Stalled Flow
Often caused by excessive grinding or overpacking.
A coarser grind and lighter tamping generally solve the problem.
Excessive Cloudiness
May indicate overly fine particles passing through the filter.
Allowing the tincture to settle and filtering the finished product usually resolves the issue.
Why Herbalists Still Use Percolation
Percolation requires more attention than maceration, but it offers something valuable: speed and the ability to fine-tune your finished tincture. If you decide you want more final volume, it is easy to run more menstruum through the marc and go from a 1:5 concentration to a 1:7 and feel confident in your resulting strength.
When a formula needs to be prepared quickly, when seasonal herbs are waiting on the shelf, or when a production schedule demands efficiency, percolation can be an invaluable skill.
Like every extraction method, it asks the herbalist to listen carefully to the plant.
Some herbs flow effortlessly.
Others teach patience.
Both are lessons worth sitting with.
References
Cech, Richo. Making Plant Medicine: A Practical Guide to Growing, Gathering, and Processing Healing Herbs. Horizon Herbs, 2000.
Easley, Thomas, and Steven Horne. The Modern Herbal Dispensatory: A Medicine-Making Guide. North Atlantic Books, 2016.